Showing posts with label tool-of-the-trade. Show all posts

Wednesday, June 17, 2015

Episode 80: ToT - Handknitting


This article is part of the Tools of the Trade series, sponsored by the Geek Girl Crafts Podcast. The author, Sandy Jacobs-Tolle describes the basics of handknitting.

You can listen to this podcast:
Or directly download it from this link.:

Tools of the Trade: Knitting
by Sandy Jacobs-Tolle

I’d like to start with a point of clarification: handknitting is the craft of creating fabric with two pointed needles. While loom knitting and machine knitting are definitely like handknitting in many ways, and produce similar fabric, please assume that I’m speaking of the process of handknitting with two active needles in this podcast.
What can you do with two pointed sticks and some string? Amazing things, really.  I first got into knitting after half a lifetime of crochet, simply because I wanted to make Harry Potter scarves that looked like the ones in the movies. I’ve gone on to my main addictions: making lace and cable projects. I’ve discovered the coloring-book fun of stranded color work, and I take pleasure in the sculptural magic of turning the perfect sock heel.  
Learning how to knit was a rocky road for me.  My sister knew how to knit, but I never picked it up from her, so I started on my own with a book and gumption as an adult, as I had with crochet as a kid. A few sad swatches later, I asked for help from my coworker and I was properly on my way.  In fact, I’m going to say that the most important tool in your knitting toolkit should be your tenacity and a willingness to make mistakes and learn from them.  Since knitting is simply lifting free, unknotted loops of fiber up over other loops, a lot can go wrong. Don’t hesitate to ask for help along the way, it will make the process much less frustrating and a lot more fun.  You won’t need to know crochet, as I did, but some elements of technique crossed over well, such as my knowing how to control yarn tension with my left hand.
Finding out what it is that I needed to get started turned out to be a little bit frustrating for me in particular.  If I can advise one thing to any knitter starting out, it’s to get familiar with circular needles right away, and have a few standard sizes of them in your toolkit.  Since I started in such an odd way, maybe I can get you going in the right direction with what I learned transitioning into knitting from crochet, and the way the craft has had some “tech” developments in the last decade or so.  

Needle: Materials & Size

So, let’s start with the fundamental tools: needles.  Needles can be made of lots of different materials, and each have a different property that helps you in your work.  Wood or bamboo are very common, and can be a happy medium of smoothness to allow wool and acrylics to glide along their surfaces, but many knitters who work with plant fibers or silk appreciate that wood is just sticky enough to keep smooth fibers from sliding all over the place. Metal, most often aluminum or steel, is another popular material used for needles. If you’re knitting with mohair or are concerned that the acrylic you’re using is a bit stiff, highly-polished metal is what you need to help your fiber loops speed along.  Plastic can keep the cost of your needles reasonable, but don’t skimp on quality-- cheap plastic needles can be maddeningly sticky and cost you a lot of hand fatigue when you have to shove stitches along. If you can pick up and touch needles at the store, it will go a long way to helping you choose. Rarer materials include:
  • carbon fiber, which is smooth, light and warmer than working with metal,
  • casein, which is a light and flexible material made of milk protein,  
  • and even very old-fashioned material like bone, which you might find at an antique shop, or online at sites like Fringe, check the show notes.
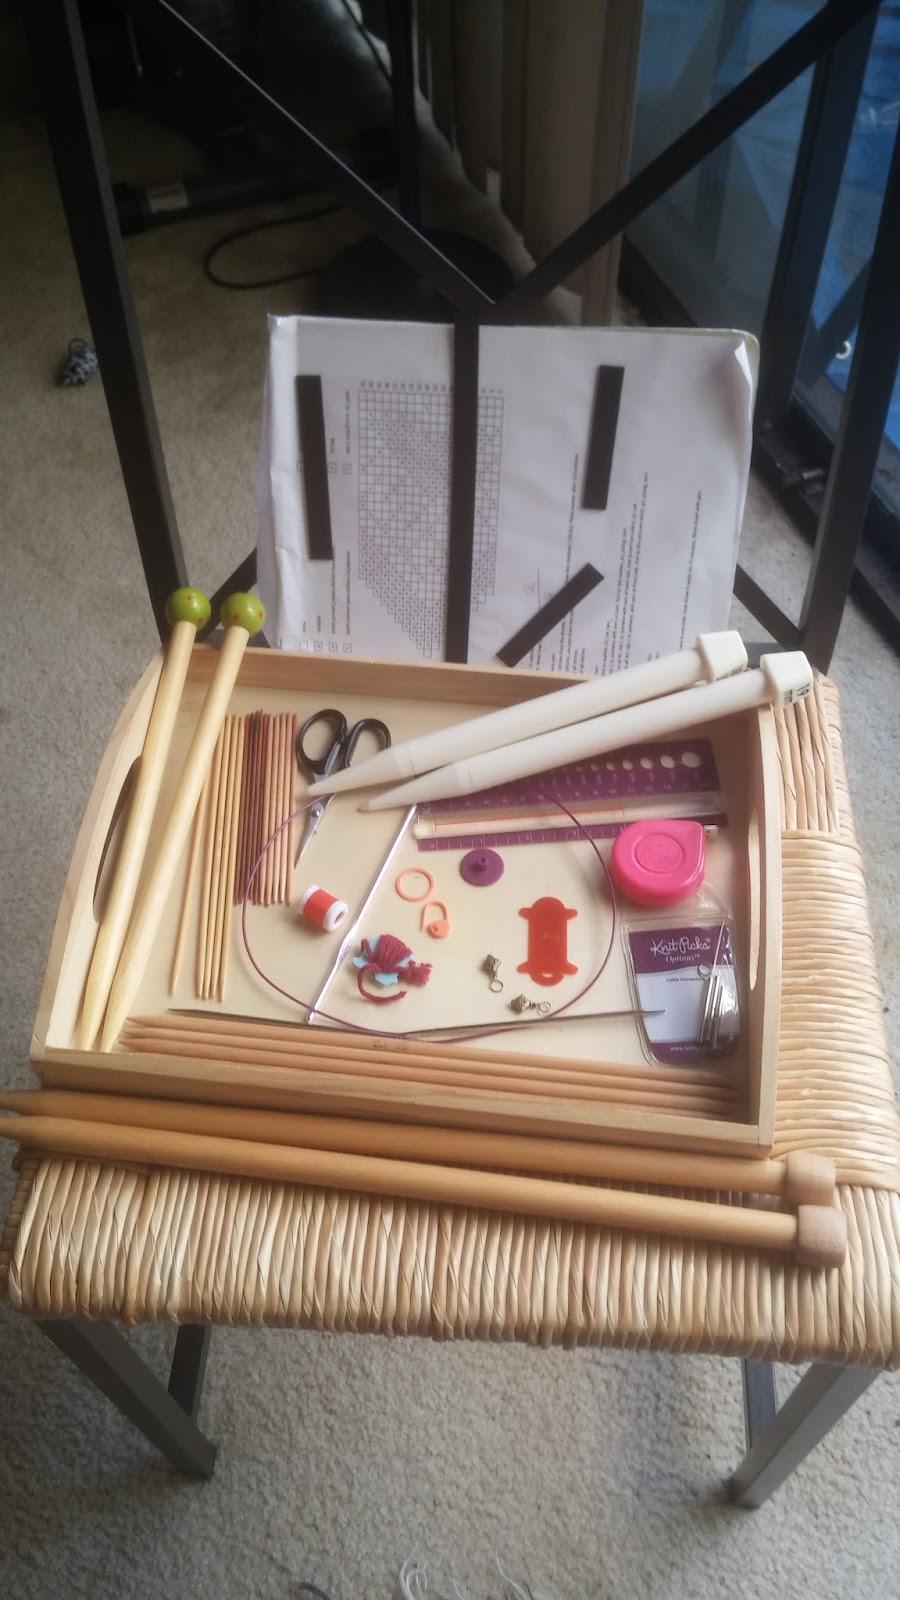
20150425_173154.jpg
Needles and notions

Gauge size, or the circumference of a needle, is also important.  Needles commonly come from the extremely thin size 0, which is 2 millimeters in width, all the way up to 50, which is 25 millimeters wide. I tend to use sizes 1-3 for plain socks in fingering, for example, and sizes 6-8 for sweaters in worsted.   If you have a tool called a needle gauge, which is a plate with various sizes of holes drilled into it, you can check the size of your needle and make educated decisions about the kind of fabric you can create with your needles and yarn. My favorite needle gauge also has a tool called a tension gauge, which is a ruler with 4 inches marked off that I can use to determine how many stitches per inch and rows per inch I’ve made in a swatch.
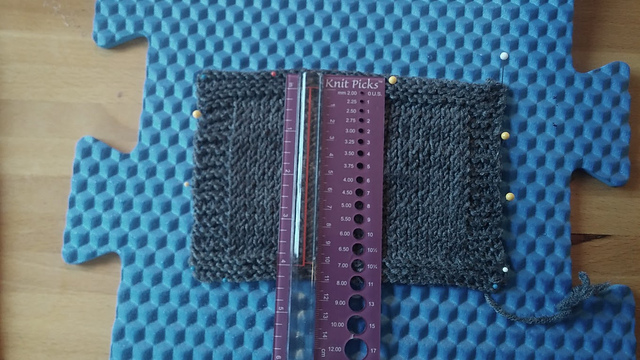
stockinette swatch.jpg
Gauge Swatch

Needles commonly come in three different types --  straight, circular, and double pointed. Straight needles, which are long, pointed needles with a button or similar “stop” on one end, can be of various lengths, depending on the size of the piece you want to knit, although 10 inches is a pretty common size, as is 14 inches for wider pieces.  Now straights may be traditional, but for me, they were part of my pain and frustration starting out.  I found them stiff and awkward, and they put weight and strain over a long period of time on an old bone break in my left hand. I bought most of my aluminum straights from a thrift store (sometimes a great place to find old crafty stuff), it wasn’t so bad to give them away to friends  I still have a few very large ones in my collection, as they are pretty fun and don’t hurt as much for me to use.
Double pointed needles are needles that are pointed on both ends, usually made in the same materials and at the same gauges as straight single-point knitting needles. Double points commonly come in lengths set to the circumference of the tube they’re supposed to make: 4 to 6 inches for making things like socks, gloves and mittens, 8 inches for hats and sweater sleeves in the round. These needles are very commonly sold in sets of 5, and as a result, you’ll see that patterns in the round usually have a stitch count divisible by four-- four to hold the stitches, one as your working needle.
Knitting in the round is not a new thing at all, and as soon as people had the knitting flat and sewing it together concept down, they immediately set to work figuring out how to better clothe our tube-shaped bodies. Early attempts at knitting in the round in certain regions tried to simulate woven fabrics typically sewn into items like stockings, but soon people were off and running in letting the physical structure of the fabric dictate the shaping of their work.
I freely admit that I prefer knitting all my socks in the round on DPNS, as they’re colloquially known, so most of my collection is of short needles in small gauges.  However, I got a strange windfall years ago, around the time when I was learning to knit and buying my straights from the thrift store.  A Japanese variety store, Marukai, sold bamboo DPNS in 12” lengths and several gauges for $1.50 each!  With these, I was able to easily learn how to make hats in the round with plenty of room for my hands to move and less chances of the yarn slipping off the needles. I still use these extra-long DPNS for some projects, and to hold live stitches in place in garment projects.
Circular needles are needles with a flexible cable of varying lengths. Common lengths are 24 inches, 32 inches, and 40 inches, but they can go up to 47 or 60 for things like blankets or shawls. You can knit flat back and forth on them, or knit in the round. They can be all of a piece with the needle fastened firmly to the cable, or part of an interchangeable set, where you can swap lengths of cable between needle gauges.
Some things to consider when using cable needles: choose a length of cable appropriate to the circumference of the piece, just as you would when using double points. It just makes it a lot easier.  If you get into knitting socks on two circulars, or on one very long circular, this rule is of course not important. I have two big cautions for you when you  select circular needles
  • pick a type that has a flexible, not stiff, cable, so that you aren’t wrestling against a coiling cable as you knit,
  • make sure the join of the cable to the needle is smooth and has no places for the yarn to snag as it passes from cable to needle. If the circular needle is of the interchangeable variety, make sure the attachment of the needle to the cable is secure-- it’s awful to have your needle fall off the cable while you’re working!  
Circulars have seen a lot of improvements in durability and flexibility in the last ten or so years, as sock knitters demanded new ways to make socks in the round on one needle with the “magic loop” method, so you’ll find them pretty reliable if you do some research on the best kinds.
I find knitting with circulars gentle on my hands, and this is my go-to method for everything but socks. Commute knitters get a benefit from using circulars-- if you have to put your work down in a hurry to catch a bus, it’s easy to pull the needles forward and keep all the live stitches on the cables.  Because they’re so versatile, I recommend giving interchangeable circular needles a try if you’re just starting out, and I think you’ll find them a convenient way to build your needle collection.

Buying Needles

Where to buy your needles: Big-box stores like Joanns and Michaels used to carry mostly aluminum and plastic needles, but the rise in the popularity of knitting, Ravelry and the internet means that the big stores are catching up on quality, too.  They carry Clover bamboo straights and circulars, circular interchangeables comparable to the inexpensive kind you’ll find on the Knit Picks website, and of course, good ol’ Boye aluminums if that is how you roll.
I picked up a set of Knit Picks interchangeable circulars as soon as I determined that was my preference.  A full set on the site gets you needle sizes 4-11, two each of 24 and 32 inch cables,  the hardware needed to lock the cables into place, and costs from about 50-56 dollars.  When I first started using them, the cables used to pop out of their metal screw ends a lot, so I relied on their no-questions-asked return policy. Now they’ve improved so that I don’t have to, but since I’ve discovered even better circs, I don’t believe I will replace with the same brand.  Stores like Webs and your local yarn store will carry specialized materials and come with reviews-- if you really want to pick the best, talk to experienced knitters in a yarn shop and maybe test-drive a needle or two!
My favorites: Chiao Goo makes a beautiful cable, simply the most flexible and fatigue-fighting one I’ve found.  Amazon.com carries their metal needle interchangeable set, which goes from size 2 to 15, for 105 dollars. I recently picked up a Knitter’s Pride Nova Platina circular needle for my Gryffindor sweater, about $8 at my local yarn store. It’s an aluminum needle with a soft finish that addresses the too-slippery issue common with metal needles. I can knit for hours with this! But my absolute favorite needles in my stash are the Brittany size 4 double points I use for making the Hexipuff blanket.They’re feather-light ash wood, harder and less bendy than bamboo, and at 5 inches long, they fit exactly in my hands, as if they were a part of my fingers. I love them, and that makes them perfect for such a huge project.
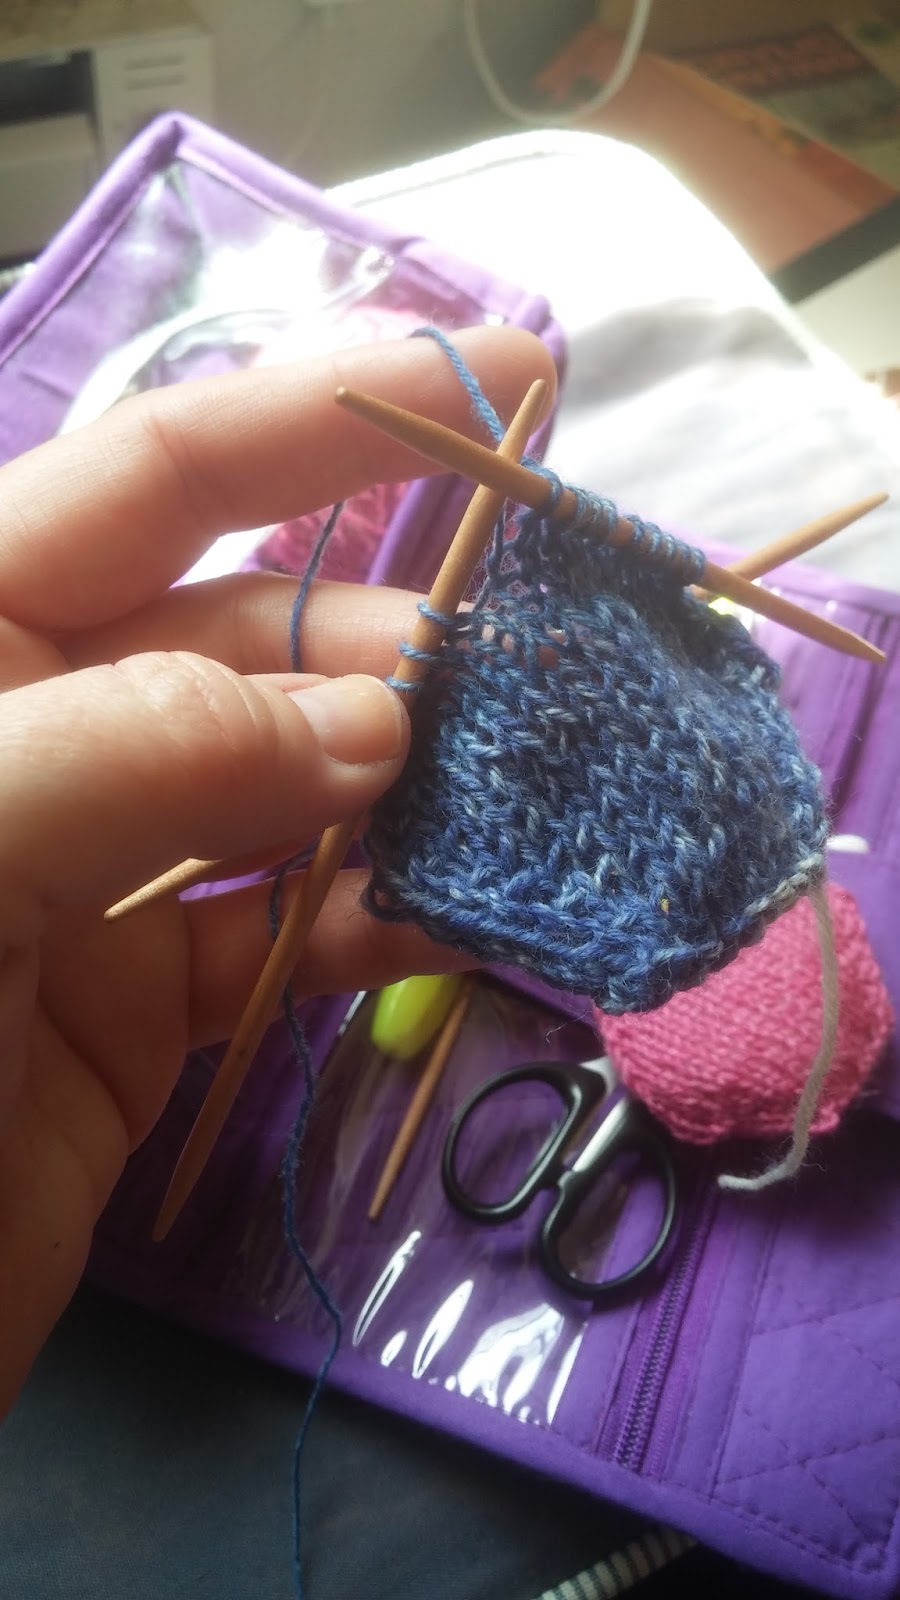
20150425_141233.jpg

Notions

The rest of the tools you need for knitting have a lot of crossover with the tools used for crochet-- things wander from project to project in my house. Here’s what I use.
  • Stitch markers: I like the kind that open and shut like little locks (Clover, about $5.50) for marking shaping  changes or things to note in my work.  I use rings that I make myself out of beads and jewelry wire for my lace projects to indicate the start and end of a repeated pattern.  For very little projects, I use a French earwire slipped into the work, since it won’t get stuck, is less bulky, and is easy to get if you have an orphan earring you can sacrifice. I tend not to use safety pins in knitting at all, unless I can find the kind that don’t have coils that get stuck in stitches.
  • Tapestry needles are usually a couple of bucks.  I buy metal ones with sharp points. When finishing my work, I split the yarn in places as I bury the thread end so that it won’t slip out.
  • Scissors: most households have them, and you probably won’t need fancy ones.  Smaller is nice if you can manage it.
  • Tape measure.
  • A row counter. I like the ones that can sit right on the knitting needle, but there are other kinds, like a hand-held clicker that requires you to press a button to count, and even a couple of apps for smartphones, where you tap the screen to count your work. I’ve used the County Plus app with some success. It tracks multiple processes and projects. I’ll link to it in the shownotes.
  • Have a few crochet hooks on hand for repairs or finishing work-- pick one at a smaller gauge than your current work.
  • Materials for blocking your work. These can be as simple as rust-proof pins and a towel on the floor, or as precise as blocking wires and a foam board with gridded lines. One cheap work-around for the foam board I’ve found is to use the foam play mats for children, which are occasionally sold at Walgreens or Target for very low prices. You can build these out like a jigsaw puzzle as big as you need to block even the largest lace shawl.   
Here are some fun optional tools that can help you do new things or be more efficient when you knit.
  • Cable needles are small double pointed needles with a curve in the center. They’re used in making cables in your work by pulling a few stitches in front or behind your piece as you knit.
  • Stitch holders are tools you can use to hold live stitches in place while you work on other parts of a pattern.  You can use a piece of smooth waste yarn to hold live stitches, or buy a tool that looks a bit like an extra-large safety pin that locks the stitches in place.
  • Chart holders are boards you can attach your pattern to and track a design line by line. Handy for lace and colorwork patterns.
  • Bobbins for colorwork.  You can buy these, or you can do what I do, and reuse the square plastic clip that’s used to hold bread bags together.  Wind your yarn on that, and lock it into place with the notched hole.
  • Point protectors: these are great to protect delicate needle tips, or to keep your work from sliding off the points when you store it.
  • End caps for interchangeable cables: if you need to store a project on its cable, remove the needles and twist some end-caps on the cable. You can then use the freed-up needles on another project!
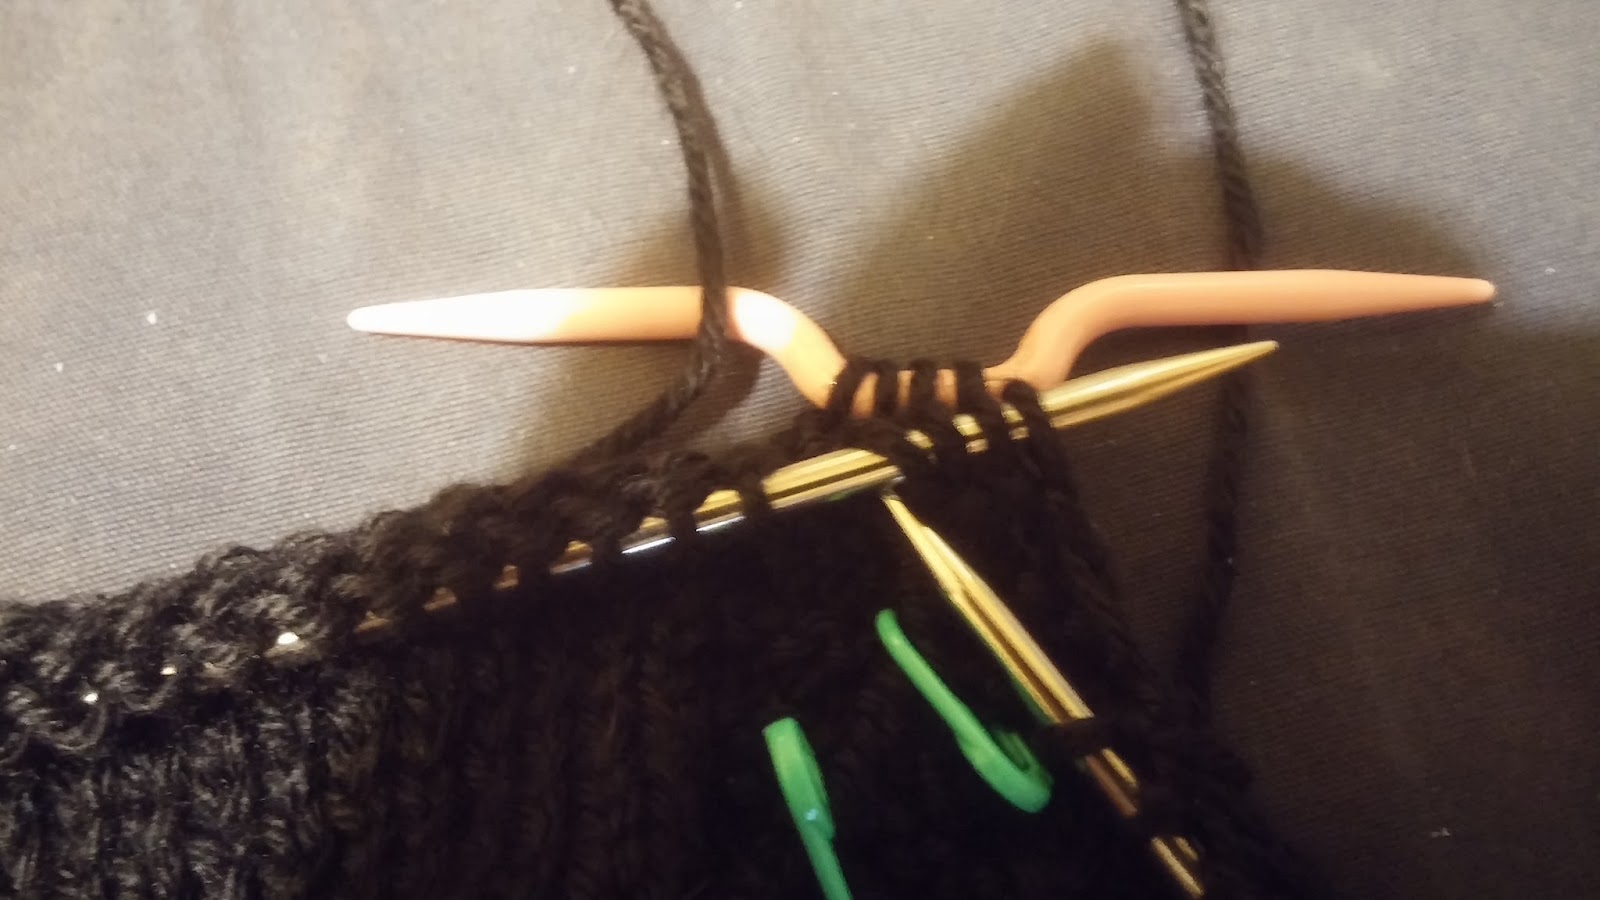
20150226_182739.jpg
Cable needle

Fiber for Knitting

After all of these tools I’ve listed, it’s time to talk about the real star of knitting-- fiber itself.  Wool is the hands-down queen of the fibers for knitting, since it’s warm, affordable, durable, and stretchy, but it doesn’t have to be the only thing you work with-- you can experiment with expensive fibers like angora, silk, or buffalo or go inexpensive with acrylic. If you’ve got texture on your mind, the simplicity of knit stitches means that ribbon, fun-fur, or boucle’ yarns yield great results.  Cotton and linen are fun choices for tops and tanks, and the stretch and bounce of fiber blends with manmade materials like acrylic makes for excellent close-fitting items like socks. Keep in mind that knitting stretches in all directions-- cotton and alpaca are two fibers that might stretch more than you want in some garments.  If you’re transitioning from crochet, as I did, you’ll need to learn more about the elasticity of certain fibers in this hobby.  Be careful with yarn substitutions in patterns until you get the hang of it.

Books and websites

As for knitting instruction, let me tell you about three books that got me off to a fine start, another book that helped me when I was more experienced, and then a whole host of websites for everything else.
Stitch and Bitch, The Knitter’s Handbook by Debbie Stoller. I’m willing to bet that this was the catalyst for a lot of the hobby knitting that took off at the beginning of the millennium. This book helped me teach myself to knit, and its friendly, informative style and very clear pictures should help you, too!  
I was smart enough to go out and find Knitting in Plain English, by Maggie Righetti, for my next book.  It is no-nonsense, explicit in detail and procedure even as it’s conversational, and so practical you’ll have half a finished baby sweater in your hands before you realize you even cast on. It made the idea of making garments approachable to me at a time when I was too timid to move beyond flat Harry Potter scarves.  Her expertise with the design industry also taught me something very important-- pattern photos sometimes tell terrible lies. She’s probably saved me hundreds of dollars and hours with that advice alone!
Stitch and Bitch Nation, by Debbie Stoller, the sequel to The Knitter’s Handbook, has more advanced techniques, including my first detailed introduction to yarn substitutions and how to rework existing patterns.  This book showed me that I can make patterns my own, and was my first guide into designing my own pieces from scratch.
Finally, the last book in my beginning phase was one I had to come back to.  I tried reading Elizabeth Zimmermann's Knitting Without Tears right after Maggie Righetti’s Knitting in Plain English, as they sat side by side on the same library bookshelf. But while Righetti was easy for me to understand, Zimmerman wasn’t easy at that stage of my learning.  As the old saying goes, when the student is ready, the master appears.  Once I’d learned after a year of work that I COULD make knitting my own, EZ, as she’s lovingly called, taught me that I can do whatever I damn well please with my knitting, as long as I knew what I wanted and what dimensions to knit to. She’s all about using math and common sense to get results. She taught me that I could cut and sew my knitting if I was careful about it-- afterthought heels and pockets and thumbs and even sleeves became part of my skill set. Once you learn the basics, use your good sense to improvise, she teaches, and it will usually work out fine. This last book brought me the final elements I needed most as a beginner: confidence and curiosity. This was my jumping off point to absolute passion for the craft.
With all of these wonderful books, can websites bring the same benefit?  Sure, especially if you don’t have someone to sit next to you.  For straight-up tutorials, there’s nothing quite like the KnittingHelp.com website. It’s full of good-quality pictures and videos that show you how to cast on, knit, purl, increase, and decrease, as well as advanced techniques like stranded color work and intarsia, double knitting, short rows, making buttonholes, and more.  If you want the awesome sauce, you can even buy premium content with really esoteric tutorials, or you can buy DVDs if you’d rather knit on the couch and get help on your TV.  
Knitty.com was one of the first online only knitting magazines, still a go-to for articles on a variety of topics-- it also features one of my favorite knitters, Franklin Habit, who translates patterns from the 1800s for whimsical modern use. Every season, Knitty’s pattern lineup is a fun treat to look forward to, like the turning of the leaves in fall or the first buds of spring.
The Craft Yarn Council of America is my resource if I need reference for yarn weights, gauges, hook size to needle size conversions, and fashion size charts from baby to large adult.
Ravelry.com -- this site came along a few years after I learned how to knit.  I cannot even begin to explain how much this site has helped me learn what to buy, how to do things. Of particular help are the ratings on yarn and tools and patterns, as well as pictures of people in finished garments-- It’s just so wonderful to see how people of my size and shape adapted a pattern to look its best! If you’re not already on Ravelry and you want to knit or crochet, go join NOW and learn along with us!

I hope I’ve given you the impetus to give knitting a try.  As you can see, there’s a lot to it, and I’ve only just scratched the surface by going over the most common tools. It’s an ancient craft with a lot of history behind it, but it’s still flexible enough as an art form that new techniques are being invented every day to make pieces that are beautiful and practical.  If you take knitting up as a hobby, you’re joining a huge and lively community of innovators and artists-- and the most important tool of the trade is one you already have-- your own initiative to learn. Happy knitting!


Links


Tuesday, May 26, 2015

Episode 78: Tools of the Trade - Spinning 101


This article is part of the Tools of the Trade series, sponsored by the Geek Girl Crafts Podcast. The author, Jade Falcon describes the basics of spinning . 

You can listen to this podcast:
Or directly download it from this link.:


Spinning 101

For this Tools of the Trade episode, I’m going to talk at very high level  about spinning. Some of you asked for this episode, so I’m obliging. In this Spinning 101, I’m going to discuss the tools used in spinning as well as the fiber. I’m going to try very hard not to get into too much detail, because then this podcast would be several hours long. My purpose it to primarily introduce you to the basics of spinning, and other Tools of the Trade will try to go into further details.

So, what is spinning? Spinning is the art of taking fiber and turning it into yarn, thread, or string. 

Spinning has been in existence (at least documented) for about 20,000 years (more or less). You simply take fiber and add “twist” to the fiber to make yarn, thread, or string. The “twist” gives the fiber structure and strength.

The mechanism of spinning can be as easy as taking animal hair or plant fiber and rolling it down your thigh with your hand or rolling it between your palms. Adding twist with your hands or rolling it down your thigh is not very efficient. You can certainly do it, but it’s hard and laborious work.

So people started using mechanical devices to help yarn more effectively and efficiently. These simple devices were basically a stick and some sort of weight to help it rotate (like a rock or another piece of wood).  Later, these became known as spindles.  Spindles were used for hundreds of years to create yarn, thread, or string. 

As time progressed, there were improved inventions, such as the spinning wheel to help increase the production of yarn.

So, lets talk about these mechanical devices right? Lets start off with spindles.

Spindles
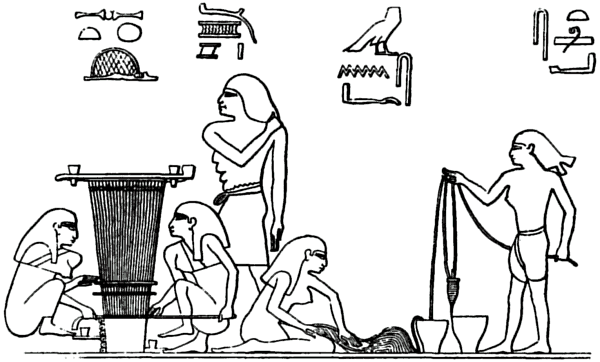
Spindles are the first simple mechanical devices to actually spin yarn.  You can find depictions of spindles from Ancient Egyptian tombs, on Grecian urns, and probably farther back in time.


A spindle is pretty easy to make. In general, a spindle comprised of two main things: a stick or shaft and (most of the time) a whorl.

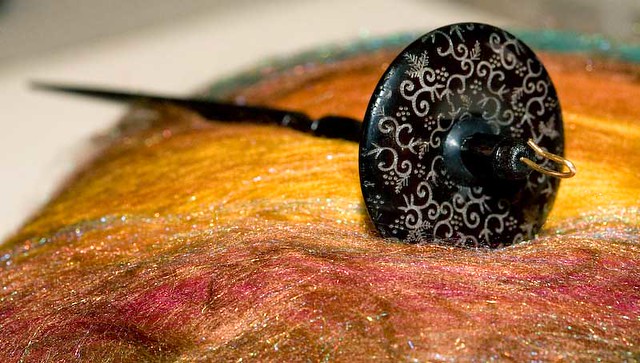
Butterfly Girl Spindle & Japanese Maple roving
Example of a spindle with a resin whorl

The purpose of the whorl is to add weight to the stick, and allow the whole spindle to rotate at a constant rate, which then allows twist to be added into the fiber.  The whorl can be round, like a wheel or “cross” shaped (like the Turkish spindle), or even spherical -- like a bead or stone. Whorls can be made out of nearly any material from  a bead, clay, wood, glass,etc.

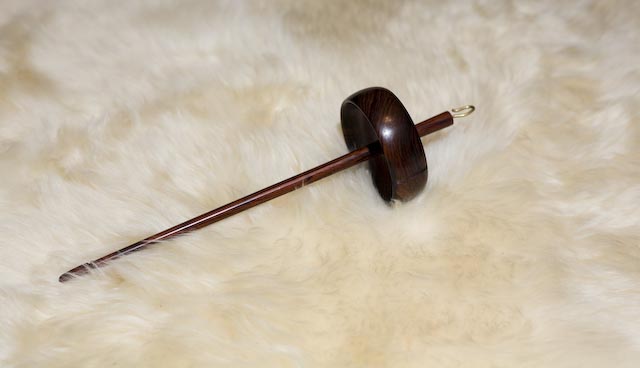
Shaft and whorl of a top-whorl spindle
 
The shaft basically acts as the mechanism to help introduce “twist” to the fiber. It also serves as the way to “store” the yarn. You just wrap the finished yarn around the stick so you can continue to make more yarn from fiber.

Spindles range in cost from a few dollars to the hundreds of dollars (depending on the materials). 

You can create your own simple spindle using a pencil and an old CD!
http://joyofhandspinning.com/how-to-make-a-drop-spindle/

There are several types of spindles. In general, they can be broken into the following categories:
  • Drop spindles -- Drop spindles to be suspended from the yarn you’re making after you start to rotate the spindle. They are "dropped" from the yarn you are making. And sometimes, they even drop to the floor. Drop spindles are pretty portable and allow you to move around. There are two types of drop spindles:
    • top whorl spindle -- the whorl is at the top of the shaft. Some have a hook at the top to help secure the yarn
    • bottom whorl spindle -- the whorl is at the bottom of the shaft. Many use a half-hitch to keep the yarn at the top of shaft.
  • Supported spindles -- Supported spindles require a surface of some sort (either a bowl, small plate, or other flat surface) in order to spin.

Drop spindles
Drop spindles to be suspended from the yarn you’re making after you start to rotate the spindle. In Peru, you see spinners who walk around during their chores and spin. I’ve seen videos of them dancing. I’ve often done walks & hikes and spun at the same time with my drop spindle. It takes a bit of practice, but it’s totally doable!

Drop spindles can come in many different sizes and weights. However, in general, top whorl spindles tend to be lighter in weight, and can spin a little bit faster than bottom whorls.  Bottom-whorl spindles are generally heavier, and can spin longer than top whorl spindles. Of course, you’ll find that everyone has an opinion on which is better. I like them both equally.

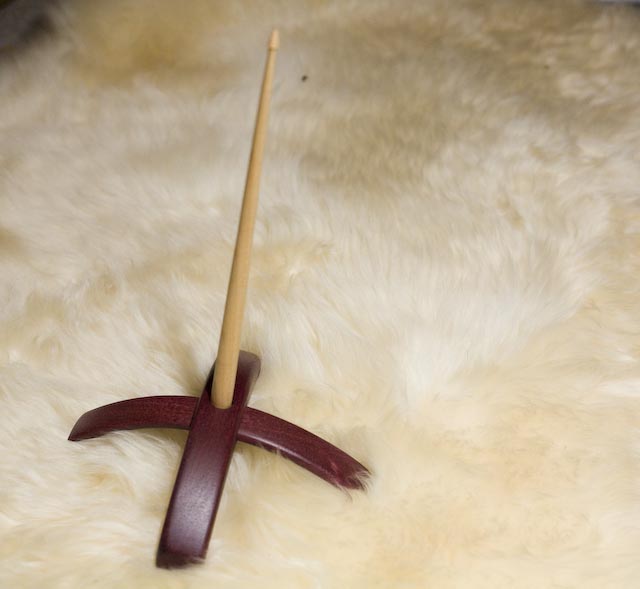
I also want to let you know about specific type of bottom whorl spindle called  a “Turkish Spindle”, where the whorl is actually a “cross”, and you wind the yarn onto the cross of the spindle instead of on the shaft, but the mechanics of using the Turkish spindle is exactly the same.

Example of a Turkish spindle, which is a bottom whorl spindle

Supported Spindles
(Disclaimer: I don’t have a lot of experience with supported spindles, so I’m only going to discuss the general attributes of supported spindles. I can’t give an opinion on them.)

Supported spindles require a surface of some sort (either a bowl, small plate, or other flat surface) in order to spin.  Unlike a drop spindle, your hand can provide additional support  to a spindle. Consequently, there are some supported spindles where there is no whorl, only the shaft (like a French support spindle, which kinda looks like a French rolling pin)

Because the yarn doesn’t need to support the weight of this type of spindle, there are some different spinning techniques you can use to produce different types of yarn with different fibers

Much like drop spindles, supported spindles come in a variety of weights. The Navajo spindle is pretty heavy and requires that you sit on the floor or on a chair and use the floor. Some are pretty light, and can be spun on a table top.

Example of Navajo spindle spinning: https://www.youtube.com/watch?v=D_p7OIghMVw

IN GENERAL:

Spindles come in many types of material and weights. You can get them in wood, carbon fiber, glass, plexiglass, metals, etc. The type of material you want in a spindle is really personal. I have spindles where the whorl is made out of wood or glass. There are some absolutely beautiful and stunning spindles out there!

However, what matters most in a spindle is the weight. The weight of your spindle can be a factor in how thick of a yarn you can spin. It’s going to be very difficult to spin a laceweight yarn on a really heavy spindle and likewise -- a bulky yarn on a very light spindle.  There are spindles that weight ½ oz (about 15 grams) up to 3oz (about 85 grams) and then beyond.

What’s the best spindle for a beginner? There’s debate on that -- some say medium weight, some say light, some say heavy.  Personally, I don’t think there’s a right or wrong spindle to learn from! Get whatever spindle type that you find comfortable and go from there. I highly recommend Abby Franquemont’s book, “Respect the Spindle” to get a headstart on spindle spinning!

Here's a link to the physics of drop spindles: http://abigailscraftshowto.com/2010/03/spindle-physics-how-drop-spindles-work/

Wheels
Wheels are another mechanism for spinning yarn. It’s just a different tool...and no better or worse than a drop spindle. They are much more expensive than a drop spindle. New wheels often start at the hundred dollars (USD) mark and go up from there. For the cost-minded beginning spinner, a spindle is a much more cost effective way of getting into spinning.

There’s debate on which tool is better at producing more yarn --- wheel or spindle? I know spinners who spin sweater quantities of yarn on their spindles in a matter of weeks, just because they do it in between waiting periods -- much like knitters who knit while waiting at the doctor’s office. Spindles are pretty portable, whereas wheels generally are not. But honestly, both are equally good at producing yarn...it just depends on how often you spin.

So how do wheels work? Pretty much like a spindle -- you introduce twist into the fiber. The difference is how it is introduced.

SIMPLISTIC OVERVIEW of WHEELS

The following is very simplistic description of the different wheel types. It is not meant to be an exhaustive detailed summary.

Spinning wheels are basic machines consisting of a wheel, a whorl (ie. the pulley), and “drive band” which is the belt that goes around the wheel & pulley.

 Example of a double drive band going around the wheel and whorls.

The rotation of the wheel & pulley cause another piece of the wheel to rotate -- called the FLYER. The flyer puts twist into the fiber as a spinner holds it, and then flyer pulls the resulting yarn onto a storage bobbin.

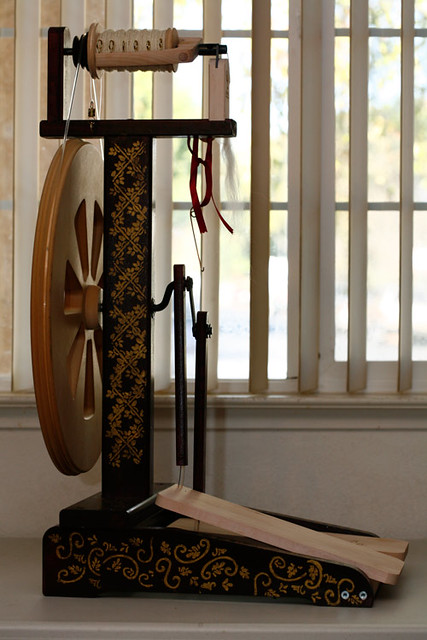
Example of the flyer and storage bobbin

For most spinning wheels, you use your feet on a treadle to turn the wheel. There are exceptions to this rule -- hand wheels and some electric spinning wheels.

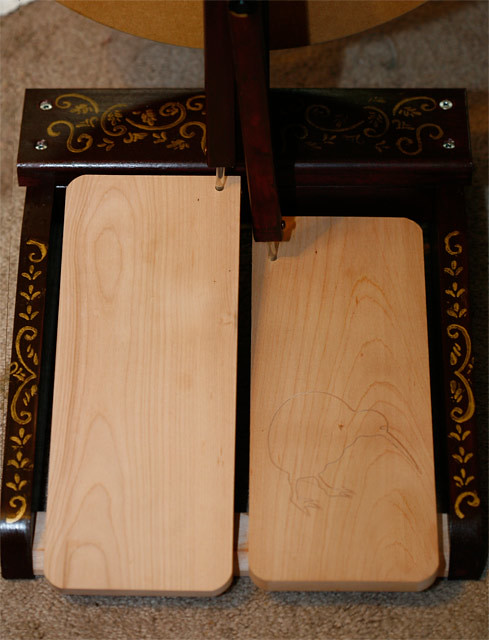
 The treadles of a wheel
 
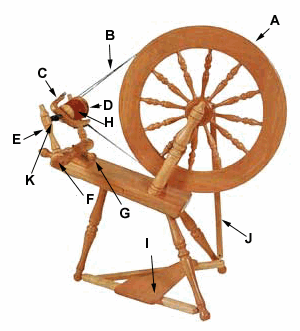
Here are some of the parts of a spinning wheel. For more information, see the link below.
  • Wheel – The wheel that rotates when treadling and causes the other various parts to operate.
  • Drive Band – A cord that goes around the fly wheel and the flyer whorl.
  • Flyer – A U-shaped piece of wood with hooks lined up on one or both arms. The hooks are used to store the yarn evenly on the bobbin. The flyer is rotated by the drive band which as a result puts the twist into the fiber.
  • Whorl – A pulley attached to the flyer
  • Bobbin – Rotates on the spindle along with the flyer and stores the yarn. It can operate with or independent of the drive band.


A spinning wheel nearly always has the parts I mentioned before, but they don’t always work in exactly the same way. Consequently, wheels can be categorized by HOW THEY WORK.

Treadle wheels are usually classified by:
  • how the drive band works
  • how tension is applied to the wheel so that yarn is pulled onto the bobbin. Tension can be applied via a brake band
Wheel Type 1:  A flyer led Single drive wheel (also known as Scotch Tension).

  • A single drive band loops around the whorl and the wheel.
  • There is a separate brake band around the bobbin that allows you to regulate how fast yarn is wound onto the bobbin.
  • The drive band & brake band work separately.
  • Example: Ashford Kiwi
An Ashford Kiwi 
 Many beginning spinners often start on a Scotch tension wheel as it can do a variety of different types of yarn.

 Wheel Type 2: A bobbin lead Single Drive wheel (also known as Irish tension).
  • In a bobbin-lead wheel, the whorl is attached to the bobbin instead of the flyer.
  • The tension is applied at the FRONT of the flyer (usually by a leather strap). These are great to spin thicker yarn.
  • Example: Louet S-10
Wheel Type 3: Double drive bobbin lead wheel
  • The drive band goes around the wheel twice and around the pulley and flyer; usually in a figure 8 configuration.  This arrangement causes the flyer and bobbin to rotate at different speeds.
  • Example Ashford Traditional

In addition to the above categorizations, wheels are classified by how they look or their “style”
  • Saxony Wheel -- what most people think about when they consider a “Sleeping Beauty” wheel. (Ashford Traditional)
  • Castle wheels -- the components of the wheel are stacked vertically above the wheel (Ashford Traveller)
  • Norwegian Wheel - looks like a Saxonomy, but it has four legs and a long horizontal bench. (Kromski)
  • Modern wheels - a hybrid of other traditional types, and tries to use modern technology to engineer a better wheel.
  • Electric spinners -- some don’t have a treadle or wheel. Electronics and gears turn the flyer. Some electric spinners use a pedal (like a sewing machine) to control the rate of the spin.
  • Hand wheels -- you turn the wheel with your hand instead of your feet. Examples include the Great Wheel or the Charkha wheel (popularized by Ghandi).
Some resources for you:

Fibers
There are all sorts of fibers that you can spin into yarn. For an excellent reference guide to fleeces and fiber, please read the book The Fleece & Fiber Sourcebook

Animal Fibers
  • Sheep - Wool. ALL SORTS OF SHEEP. See big book of fleeces
  • Camelids - Alpaca, llama, vicuna
  • Rabbits, mink, possum
  • Goats
  • Bison, Yaks, Quivuit
  • Silk
  • Dog
Plant Fibers
  • Flax / Linen
  • Cotton
  • Bamboo
Artificial Fibers
  • Nylon
  • Acrylic

Each type of fiber can be spun multiple ways, although some fibers are often spun BEST in a particular way because of their staple length.

What is staple length? Staple length is the length of the given fiber.

There are long staple length fibers that can measure 3” or longer (like silk or flax), and short staple length fibers like merino or cashmere that measure in inches.

Woolen versus Worsted Spinning
Woolen and worsted spinning are simply different methods for how twist is introduced into fiber.

Some fibers are best spun in certain ways. For example, shorter staple fibers, like cashmere are best spun woolen because of how short the fibers are. Whereas a long staple length fiber, like silk, is best spun worsted.

However, these are guidelines. I’ve certainly spun silk woolen when mixed with other fibers. I won't go into too much detail, as it is an exhaustive topic, but for now, just be aware there are different methodologies for spinning fiber.

Summation
I hope that this quick & dirty Tools of the Trade is helpful in learning the very basics of spinning. Let us know what you think in the comments or other pieces you want more information.

Friday, March 20, 2015

Episode 73: Tools of the Trade - Buying a Sewing Machine


This article is part of the Tools of the Trade series, sponsored by the Geek Girl Crafts Podcast. The author, Jade Falcon describes the how to buy and maintain a sewing machine. 

You can listen to this podcast:
Or directly download it from this link.:

How to Buy a Sewing Machine & Take Care of It

If you're a beginning costumer/cosplayer or just want to get into sewing, a good basic sewing machine can make the difference between learning to love sewing or loathing it.

With the plethora of sewing machines out there, it can be difficult to discern what type of sewing machine you need. There are a many sewing machines with extra bells & whistles (such as embroidery features, extra fancy applique stitches, etc), and you can get lost in nifty new features that you might not really ever use, but are SUPER COOL!.

There are some basic things you should really look for when you're ready to purchase a sewing machine that will take care of about 80-90% of all of your sewing needs.

Before I discuss these features, I want to classify sewing machines into two types. The following are oversimplified definitions:
  • Cabinet sewing machines -- these are machines that are built into a cabinet or table of some sort. You’ve probably seen your grand mother or great-grandmother with these machines. 
    • In this oversimplified definition, I'm also counting industrial sewing machines under "cabinet machines" because they are bolted onto a table. 
    • These machines aren’t portable, and the sewing machine is pretty much bolted into the cabinet or tabletop
Example of an industrial sewing machine bolted into a table.
  • Portable sewing machines -- most modern sewing machines are portable. They don't require a cabinet
    • All portable sewing machines have what is a called a “free arm”.  The free arm holds the bobbin, shuttle, and feed dogs. And there's usually a detachable piece that snaps on/off to give you a larger working space.
Example of bobbin, shuttle, and feed dogs within the arm.
    • A free arm sewing machines allows you to sew anything with a curve or is a tube (i.e. pant legs, sleeves, etc) --- basically any shape that cannot be sewn flat.  You can learn how to sew curves without the need for a free arm by bunching up the fabric or other techniques, but having a free arm can really make be a time saver.
    • Basically most modern sewing machines are considered "portable" or “free arm machines”
Example of a modern portable sewing machine with a free arm

I'm not trying to dissuade you from buying a cabinet. However, there are disadvantages to such machines -- including the need for more space to store the whole cabinet and lack of portability. My industrial sewing machine pictured above requires a lot of space, whereas my portable sewing machine, I can plunk down onto any flat surface.

[Note: Many newer sewing machines have been computerized (like the Viking shown above). However, a computerized sewing machine does not equal better. A good mechanical machine (like the industrial above) can do things equally as well, if not better than some computerized versions. If anything, computerized sewing machines are more expensive to purchase and maintain.]

In this article, I’m primarily going to discuss features that can be found in any type of sewing machine.

Basic Requirements in a Sewing Machine

There are some simple things you NEED in a sewing machine:

1) Is it easy to use? Such as threading and adjust?
A machine that’s easy to use is the one you’re going to use more often. I have several sewing machines. One machine an older industrial that is perfect for leather and heavy fabrics. BUT it takes me about 2 minutes to set up the thread tension each time I use it, and I have to test it out on scrap fabric every 30 minutes to ensure the tension is the same. And another machine lets me thread in under 10 seconds. Guess which one I tend to use a lot?

So what do I mean by easy to use?
  • THREADING: Can you easily thread the machine. If a machine is complicated to thread, you're not going to want to use it or change threads a lot. Personally, I tend to change threads quite a bit for different purposes, and I find that the ability to change threads is a god-send.
  • ADJUSTING: You want to be able to adjust two things on your machine
    • Tension -- how tight your stitches are.
    • Length of your stitches.
Basically, the easier it is to adjust your machine, the more you’ll be able to use it on different fabrics.
Here’s an article on adjusting tension: Adjusting your Sewing Machine Tension (a Craftsy article)
  • OTHER EASY TO USE FEATURES: Other things that make a machine easy to use:
    • How is the bobbin inserted into the machine? Is it easy to thread and insert? (The bobbin is a small spool of thread that creates the lower half of the stitch)
    • How easy is it to change the needle?

2) A good straight stitch.
The straight stitch is your most basic stitch and the one you'll probably use the most often (75-90% of the time). You want a sewing machine that allows you to adjust the length of your straight stitch (see Point #1) as well as one that is easy to go in reverse.

3) A good basic zig zag stitch
The second most used stitch is the zig-zag stitch. This stitch works well with stretch fabric, joining two working pieces, attaching appliques, and help prevent fraying of a raw edge.

In the following picture, you have:
  • two lines of straight stitches (with varying lengths)
  • two lines of zig zag stitches (with different lengths)


Nice-to-Have Features in a Sewing Machine
New machines nowadays have a lot of little extras such as cutting your thread for you or automatic tensioners. While these features are nice, they aren’t critical to your basic needs for sewing. After all, you can easily cut thread with scissors instead.

Consequently, the nice-to-have features in a sewing machine are:
  • A button hole feature -- You can create a buttonhole using a regular basic sewing machine using a straight stitch and zig zag stitches. However, a machine with a buttonhole feature can be a time saver.
  • A machine where you can easily obtain different “feet” or has machine comes with different feet. For example, a “zipper foot” can often mean the difference between tearing your hair out when installing a zipper or making it quick and painless.
    • Some recommended feet are: 
      • zipper foot, 
      • walking foot (for velvets and other slippery fabrics like stretch), 
      • zig zag foot,  
      • button hole foot
      • a roller foot (for thicker fabrics or fabric with nap)

How to find a machine:

At one point in sewing machine history, there was a lot of innovation. Sewing machine manufacturers were able to leap frog each other in technology. However, in this day and age, there are no major improvements in sewing machines. Most manufacturers add bells & whistles to existing features.

Most computerized sewing machines simplify some tasks, but overall, they do the basic things that mechanical (non-computerized) sewing machines do.

In addition, many sewing machine brands have farmed out manufacturing to Asia. So, price is not indicative of quality.

You can find sewing machines at your local big box store (like Joanns) -- they usually sell low-to-moderately priced sewing machines, starting at about $100.

You can also go to higher end fabric stores that carry an array of VERY expensive machines that cost as much as a used car -- these are often computerized sewing machines with a lot of extra features. (With some of these specialty fabric stores or sewing shops, you have to call to get a price on the machine!)

You can also try finding a sewing machine on Craiglist but, if you do that, I highly recommend knowing a lot more about sewing machines because you never know in what state a used sewing machine is in, especially if you're new to sewing!

However, there is an intermediary location where you can purchase good quality sewing machines that you know will work. I highly recommend finding a good sewing repair shop. They often sell used machines that can fit any budget, where you can find a good solid machine for less than a new one, and probably a higher quality than the low priced “new” one.

Finding a good sewing machine repair shop is like finding a good mechanic. You want to find them and HOLD ONTO THEM as long as you possibly can.
  • Look for a repair shop with a good reputation.
  • If possible, find a repair shop with a trade-in policy. You can trade in your sewing machine for an upgrade.
  • A good repair shop will be able to help you tune-up your machine later or help you fix any problems.
  •  A good reputable place will let you try machines unhindered. If you’re lucky, they can help you pick out a good machine. A really good shop will give you the advantages / disadvantages of each machine. 
Then go to the repair shop:
  1. If possible, bring someone who knows how to sew. They can help you be a sounding board.
  2. Try out different machines.
    • Try threading the machine several times, including changing out the needles.
    • Change out the bobbin several times.
    • Try the basic stitches -- straight stitch, zig zag. 
    • Try the button hole feature (if it has one)
    • Make sure you know how to "reverse" the sewing machines. 
  3. Ask if it comes with different feet or how you find them.
  4. Bring the type of fabric you think you'll be working on -- cotton, stretch fabrics, denim, leather and try it on the machine. Make sure the machine will go through the types of fabric you brought. If you're going to be working on several layers of denim, make sure the machine will go through several layers of denim.
Inheriting a sewing machine:
Don’t pass up on Grandma’s machine as long as it’s not a treadle (i.e. it uses electrcity). If it’s an older machine, you can get it serviced and repaired for probably less than a new one. A good repair shop will tell you if it's even worth fixing.

Brand recommendations:

I haven't used a lot of different machines, so it's hard for me to give you a large recommendation list of different sewing machines.  My machines include: older Singers (pre 1960s), Kenmores (1970s), and various Vikings (Colormatic 6000, 325 series) including a few modern ones (such as the Viking Designer). They’ve been workhorses for me.

For this podcast/article, I spoke with a couple of costumers whose opinions I trust. Here’s what they had to say:

Andy is a costumer in my area and has some great information about sewing machines. (See the link to his article below.) Here are his recommendations:
    • Pfaff's 300 series automatics (332, 332-260, 360 and 362) are excellent machines, basically scaled-down versions of their industrial models.
    • Elna's "Supermatic" series are sturdy and offers many unique features (including a surprising level of portability).
    • Viking's venerable "Model 21" and their 2000 and 6000 series "Colormatic" machines are real workhorses.
(Note: Personally, I like the older Vikings too.  Some of the newer (2010+) Viking machines aren’t as well-made for the price they want. I recently started having issues with some of the newer Vikings, and I'll probably never buy another one again.)

Lynne primarily works with vintage machines that do straight stitches only. She also repairs vintage sewing machines. Here are her recommendations:
"If a machine is all metal, with nothing broken inside it's usually worth fixing up. Once running, they won't die. Most aren't free arm, but if you are on a tight budget not having a free arm shouldn't deter you. Our sewing sisters from yesteryear did great things without a free arm machine.
    • Most pre-1965 Singers such as the 500a or 503 or Kenmores are great.
    • The Necchi supernova is another amazing European machine.
    • A great free arm machine is the Elna Supermatic. I'd recommend an Elna any day.

    Starting in the late 1950's Japan was producing very good clones of popular American made zig-zag machines. The names are all over the place as these clone machine were what we call "badged" machines. In other words they were made in Japan for a particular store and badged with that name. Japan had 15 factories that produced machines but hundreds of names appear on these machines. A lot of them look similar to this machine in the picture. Some are badged White or Brother and are very good, heck they are all workhorses. "

A Badged Simon machine (Does straight & zig zag) 
Courtesy of Lynne Taylor

A badged White machine, but only does straight stitch
Courtesy of Lynne Taylor

Cost of a Sewing Machine

The cost of a sewing machine can range from $100 (very cheap Singer) to a couple of thousand dollars (USD) for new machines. I know of one sewing machine with a lot of bells & whistles -- it sews, it embroiders, it cuts your thread for you  --- that cost $10,000+ (USD).

Used sewing machines can go for a lot less (as little as $50), depending on their state and whether they need repair. You can find a good used sewing machines that fit any type of budget, especially if you get the basics that I mention above.

Note: There are some sewing machine collectors, and some vintage sewing machines in good-to-mint condition can be expensive. So be aware of that when looking for a sewing machine.


Maintaining Your Sewing Machine

Just remember that your sewing machine is a machine just like your car. It has moving parts. And it will need regular tune-ups & maintenance to ensure that it is running smoothly and correctly. Depending on your machine, a tune up can be as little as $50 or if you have a computerized machine --  $100+ (USD)

Basic mechanical machines have a few things that are advantages:
  • Cost of maintenance is lower. Sewing machines with digital or computerized parts are lot more expensive to tune-up.
  • More places will be able to service them. I have a computerized Viking that I need to have serviced at a location 30 miles from my home, because it is the ONLY sewing repair shop that will take these machines. My other repair man will only take mechanical sewing machines. :-(
The repair shop can keep your machine up to 2 weeks, depending on how busy they are. So make sure you tune it up regularly, and in between projects. Definitely you want to know that your machine will work well when you start that BIG HUGE cosplay project.  (You don’t want to be like me, where you get stymied in a sewing project because it needed a tune-up)

Some people claim that they haven’t tuned up their sewing machines in years. Of course, I also know people who don’t tune-up their cars or change their oil. I don’t recommend it. Nor do any manufacturers.

How often to tune-up:
  • It depends on how often you use your machine. The type of fabric/ thread you use...and how well you maintain your machine.
  • Rule of thumb --  tune up your machine once to twice a year if you’re a heavy costumer and sew a lot. If you're a low to moderate sewer, tune up every 1-2 years.
  • If you’ve stored your machine for a long time -- they need to be tuned up before you start sewing.
  • Do it before you REALLY need your machine for a project.
Do some of your own maintenance --
  • Oiling it regularly -- You can get sewing machine oil at the machine repair shop). Read your owner's manual for where to oil your machine.
  • READ your owners's manual -- If you don't have the ownser's manual, look online. Many people have put up the manuals for older machines.
  • Changing out your needles very frequently -- (probably after every 8 hours or so). (I'll probably do a Tools of the Trade just on needles). If you use dull needles, your stitches won't be as sharp, result in skipped stitches, etc. Also, it can tear up your very expensive fabrics ….or even damage your sewing machine.
    • Cost of needles vs. cost of fabric + sewing machines = NO BRAINER.
  • Don't sew over pins -- it'll mess up the timing of your machine (costing you money), broken needles etc)
  • Remove lint regularly --  Open up your sewing machine and remove the lint around the bobbin area and throat/stitch plate. I recommend buying:
    • I recommend buying an specialized attachment for your regular vaccum that you can get at the repair shop or any sewing machine store.
    • A small lint brush or bent nose tweezers (like the dentist uses) to help remove crap from your machine.
In addition to doing your own maintenance:
  • Cover your machine when not in use. You can buy a cover for it, which just helps prevent accumulation of dust and grime in the sensitive parts of your machine. As a rule, I always keep my machine covered when not in use. I also have a sewing case specifically for it, in case I travel.
  • Pay attention to your machine. If you know what it sounds like when it's running fine, then you'll "hear" and "feel" when it starts to run wonky.

So, that’s it. I hope this helps you get a better idea of picking out a sewing machine and keeping it running for years. Happy Sewing!

If you want to read about my own adventures in sewing & costuming, check out my blog at: http://geekgirlcrafts.blogspot.com/


Links:

Monday, February 16, 2015

Episode 70: Tools of the Trade - Crochet with Sandy


This article is part of the Tools of the Trade series, sponsored by the Geek Girl Crafts Podcast. The author, Sandy Jacobs-Tolle describes the basics of crochet and what you need to get started. 

You can listen to this podcast:
Or directly download it from this link.:

Crochet Basics

by Sandy Jacobs-Tolle

Crochet is the fiber art of making material (I hesitate to call it fabric, for reasons I’ll get into later) with a crochet hook and a length of fiber.

For most crochet techniques, a slip knot is the structural basis for many stitches, and loops pulled through other loops form the body of the work.

Slip stitch. The beginning of all crochet


Since you usually work with only one loop “live” at a time, and you have the yarn in one hand and the hook in the other, it’s a pretty easy technique to learn.

Crochet chain

I caught on to it quickly as a little girl. I taught myself from a book when I was about 7 or 8.  When you’re self-taught, you often get the freedom of experimenting since nobody’s given you a project to complete in a certain way.  That’s where I learned that the really cool thing about crochet is that it’s sculptural.  You can pull up a loop almost anywhere you want on your work.

Rows of Single Crochet

 You can grab another color and make a chain on the flat surface of your project.  You can double up stitches in the same space and make ripples and corkscrew spirals.

Treble Crochet

As a result, I’d say my favorite things I make in crochet are toys and animal/monster hats. With novelty yarn and sculptural stitches, the possibilities for making crazy and cool stuff are endless.  I’ve made a stole that looked like an opossum (playing dead) with a matching furry purse, I’ve made hats that look like the Yipyip aliens from Sesame Street.

 Elegant hats are par for the course too!

I’ve made pirate octopi, and even Calvin’s beloved tiger, Hobbes. 

I’ve also made a very elegant lace cardigan, so it’s not all silly stuff, either.


Sounds fun, right?  Well, you’ll be happy to know that there’s no prerequisite skill you need to get started.  I’m still learning new things with this hobby because of its versatility, so you’ll be pleased to know that it’s easy to pick up and get really creative. The fact that only one loop is live at any time means that mistakes are easy to prevent or fix.  When I’ve made a mistake in knitting stranded colorwork or cables, or when I’ve forgotten to place a lifeline in a lace knitting project only to have a dropped stitch ladder its way down-- that’s when I long for the simplicity of giving a single strand a good tug and erasing the mistake, as one can do in crochet. 

There are two things you’ll absolutely need to crochet: hooks and fiber.

Crochet Hooks

Crochet hooks are sold in many sizes, here in the US there are two category types: standard and steel.


Standard hooks are labeled by letters of the alphabet and the diameter of the shaft.  B is the smallest of the standards, at 2.25 mm, and the biggest you can easily find in stores or online is S, which is 19 mm, but Chiaogoo sells a size U which is 25 mm across!  Of the standards, I tend to use sizes G through J most, as they correspond to DK through bulky weight yarn. Steel hooks are for fine gauge lace and thread work, for the most part.  They are labeled with numbers from 00 to 14.  This is pretty confusing, since 00 is the biggest and 14 the littlest, so I definitely advise going by millimeter size. Size 14 is only .75 mm, while 00 is the same size as standard hook size B, 2.25 mm.

As you can imagine, the material of the hook can be constrained by size, but the most common materials hooks are made of are aluminum, plastic, and wood.  There are advantages and disadvantages to each, most having to do with the relative “stickiness” of the material.
  • Slippery cotton on slick aluminum hooks might cause you to choose wood or plastic for a better hold on your work. 
  • If you have a sticky yarn (some acrylics practically squeak on the hook!), you’ll want to use a slick metal hook. 
  • If you have a splitty yarn, you might want a hook with a pointed head carefully constructed from wood or metal to better pierce each loop and catch all the loose fibers in the hook.
When selecting your hook size for a new project of your own design, it’s good to take a look at the fiber you’re using.
  • If your fiber looks like it will “pop” out of the hook, go up a size so that it fits neatly inside. 
  • If it looks like it will shift around and be difficult to control, go down a size. 

In time, you might want to experiment with fiber weight that doesn’t match the hook size, since there are cool things you can do with that, but when starting out, you should keep it simple.

My personal experience  -- I learned on Boye aluminum hooks, and have not strayed far from this type.  The throat and head of the hook are like an extension of my fingers, and I have very regular gauge, so it’s pretty obvious they work great for me.  If you want to get a starter kit, about $13 at a Joann’s or Michaels will buy you a pouch of sizes D through K, which is a great jumping-off point for a variety of projects. Roughly $30 will get you a full range of the small steel hooks. As for organizing the lot, I have standards in one pouch, all my steel hooks in another, both pouches were about $12 each.

Fiber

Now for fiber, the other must-have! Crochet uses a lot of yardage, up to a third more than knitting a similar-sized piece might.  As a result, many crocheters tend to keep fiber price high in their minds when planning a project. 
  • Cotton is one of the nicest fibers to work with for crochet for the money, and there’s a multitude of options, from kitchen cotton to pretty mercerized thread, to work with. 
  • Acrylic and crochet is almost inseparable, since a lot of folks automatically think of the ubiquitous granny square afghan over the couch made in space-age fibers and hippie earth tones. The cool thing about today’s acrylic is that it is softer, stronger, and much, much less squeaky than it was 20 years ago.  The price is still nice, too.  The wacky novelty yarns are usually acrylic, too, so it’s worth having fun with that option. 
  • Pure wool and other animal fibers are always wonderful to work with, but can be very warm in some climates when made into dense crochet. Consider a blend of wool and acrylic for a lighter weight and lower cost option. 
If you simply can’t decide, or want to experiment with your own blend, it’s really easy to hold two strands together in crochet without dropping a stitch.

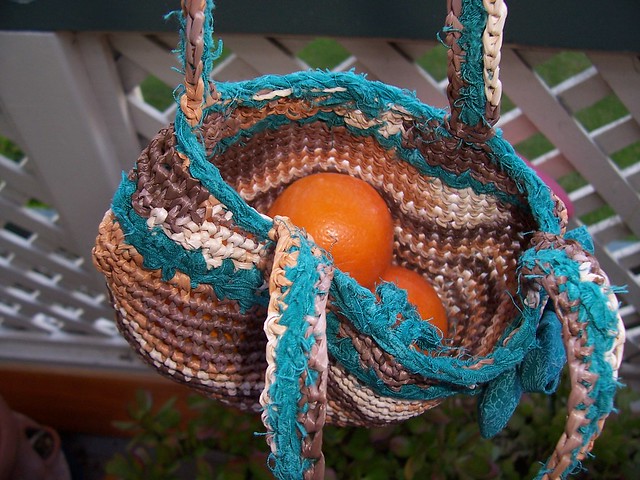
Even with all these options at the store, it’s possible to crochet in anything fibery.  I’ve crocheted with raffia, strips of cotton fabric, VCR tape, butcher’s twine, fine-gauge metal wire, and cut-up grocery store plastic bags, to name just a few possibilities.  I find tempting things at HomeDepot almost as much as I do at the yarn store!

 Purse made for my Etsy shop. 
Raffia and cotton rags cut into strips -- cute and tough as nails!

Other Notions for a Crocheter

Here’s the rest of a well-stocked toolkit.  Some you might already have, some are not hard at all to get at craft stores. 
  • Stitch markers: you’ll really only need the kind that open and shut like little locks (Clover, about $5.50), or split rings, since solid loops would get stuck in your work. I’d caution against safety pins since fiber can stick in the coils. For very little projects, I use a French earwire slipped into the work, since it won’t get stuck, is less bulky, and is easy to get if you have an orphan earring you can sacrifice.
  • Tapestry needles are usually a couple of bucks.  I buy metal ones with sharp points, because I work with more slippery fiber when I crochet. When finishing my work, I split the yarn in places as I bury the thread end so that it won’t slip out.
  • Scissors: most households have them, and you probably won’t need fancy ones.  Smaller is nice if you can manage it.
  • Tape measure: I buy cheap ones because they go walkabout so often.
  • Big box craft stores often sell kits of these accessories on their own, usually for $20 or less. 

Optional fun stuff:
  • Project bags, of course! I don’t need to tell fiber artists how to accessorize, do I?
  • Afghan hooks are long hooks with a button or a cable on the end, designed for a specific kind of crochet called afghan or Tunisian crochet. Unlike regular crochet, Tunisian crochet has several live loops in use, necessitating a long shaft or cable to keep them all on.
  • Pencil grips or other ergonomic tools: some folks find that adding mass to the shaft helps them hold the hook more comfortably. Some enterprising folks make their own Sculpey handles for their hooks. Whatever works! There are video tutorials on how to do this, a good jumping-off point is a video by Carol Ventura, who does tapestry crochet. https://www.youtube.com/watch?v=I6gfwP4R21Y
  • Stitch counters: I’m never quite sure why folks have them except for super-huge projects, like casting on over a hundred stitches.
  • If you want to search for really good quality supplies, your local yarn store can have some wonderful options to check out, from fancy yarn to hand-turned wooden hooks. Etsy and eBay are full of woodworkers who turn out crochet hooks that are as lovingly crafted as Harry Potter’s magic wand from Ollivander’s. But what got me into it as a child, and what kept me at it as an adult, is its inexpensive starting point and its forgiving nature to busy, sometimes clumsy hands. 

Learning

Books: 

There are a couple of books that I recommend for a great start at the craft.  I can’t recommend the book I learned from as a child, since it had flaws that I had to unlearn, but these should get you started in the right direction with lots of pictures, ideas, and stitch diagrams.
    • Stitch and Bitch Crochet: the Happy Hooker, by Debbie Stoller, Workman Publishing Company; Later Printing edition.  Edition matters in this book, the first had lots of errata to sort out.  This one is a lot of fun and would be great to get kids and teens interested in the hobby. The patterns are cute, sexy, cool and unfussy.

         
    • Donna Kooler's Encyclopedia of Crochet (Leisure Arts #15906): I bought the 2002 edition, there is a 2011 update which I have not yet seen.  This book teaches you the history, methodology and technique of crochet, with lots of pictures and (hooray) help for lefties. It’s where I learned how to read and write crochet stitch symbols, which becomes invaluable in working with patterns from other countries.  It has a lot of stitch patterns you can learn, but it’s not as “encyclopedic” in that regard as other books that are just stitch pattern collections.

On the web: 

  • The Crochet Guild of America and the Craft Yarn Council of America: if I need reference for yarn weights, gauges, hook size to needle size conversions, and fashion size charts from baby to large adult, these two sites have it.
  • Video tutorials: I’m open to the idea, but I learned from static pictures, so I can’t say for sure that there’s anything I’d recommend.

First Project Recommendations

As for getting started, I’m just going to give my standard advice for any new needlework you decide to pick up: don’t do scarves.  Potholders and scrub cloths in kitchen cotton will be the best place for you to learn your stitches in crochet, and if you don’t like how they turned out, you can put them under your pans instead of wearing them in public.

Happy hooking!